At the time I'm posting this part 3 of the Step by Step, the actual model is already done painting and fielded one time. On a scale D&S's performance oscilated between "meh" and "okay", but that's mainly because my opponent had his Lord Arcanist Ossyan using his feat (making my ranged attack damage roll losing one die) and D&S didn't hit, so it was a POW 7 hit against ARM 19 Hypnos and several ARM 18 shield wall Helbardiers. When D&S charged Hypnos the damage outpout (-4 on every melee damage roll) wasn't enough to cripple a single system and Hypnos served his vengeancy cold and swiftly the following round.
So back to the painting tutorial, I rather save my war stories for later.
When I had a lot of the bandages and clothes finished, I decided to paint the loincloth in a qitari pattern and also paint some of the heavy leather straps all over the armor.
I started with a basecoat of Bootstrap Leather (P3) and Dryad Bark (Citadel), i a ratio of 1:2.

For the first highlight I added two small drops of Cold Grey (Vallejo).

After this I made a wash consisting of Bootstrap Leather, Dryad Bark and Skrag Brown (Citadel) and put painted them in two thin layers into all recesses.
For the finishing highlight I added Hammerfall Khaki (P3) and painted several smaller lines to indicate some texture on the loincloth.

As a complementary colour to the loincloth's brown and the intended pale skin with a slight blue hue I chose green for the right colour on the qitari. So I mixed a light green consisting of Warboss Green (Citadel), Moot Green (Citadel), in a ratio of 1:1 and a single drop of Cold Grey.

I painted squares (pure Caliban Green, Citadel) where the green lines on the pattern met each other and additional lines of pale orange, using Skrag Brown.

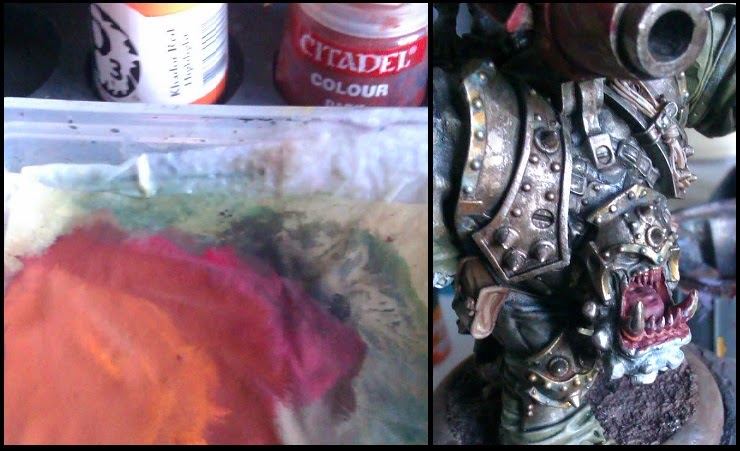
At this stage I'd thought, it'd be finally time to get started with the skin. But at first I needed to paint Dozer's mouth, for when I paint all adjacent areas in a pale whitish-bluish grey and put then a drop of dark red on the skin, it'd be hell to paint over it.
The mouth's inner parts like tongue, teethridge, oral cavity, and the roof of the mouth were painted with the same basecoat: a 2:2:1 mix of Mephiston Red (Citadel), Dark Skin (Citadel), and Matt Black (Warpaints).

To the prior mix I added Khador Red Highlight (P3), making it 1:1, as a highlight for everything but the tongue.

An additional highlight with even more Khador Red Highlight, focusing on the front teethridge.
For the tongue I chose a very pale purple, consisting of Light Flesh (Vallejo) and Xereus Purple (Citadel), in a ratio of 2:1. (Since the Vallejo paints containing so much more pigments, it was actually a brush fully loaded with Xereus Purple and only half a brush of Light Flesh.)

For the teeth I added lots of Hammerfall Khaki right into the prior mix for the tongue.

Into this paint I mixed in Screaming Skull (Citadel), in a ratio of 1:1. At this stage I painted single lines on the teeth connecting at the pointy end.

Additional Light Flesh for the teeth.

Since I didn't want the teeth to look as white as a covergirl's bright smile I put together a reddish-brown glaze, consisting of Carroburg Crimson (Citadel), Reikland Fleshshade (Citadel) and Glaze Medium (Vallejo), in a ratio of 2:1:4. I painted three thin layers of this glaze betwen the teeth in the upper jaw, but took more time for the lower jaw's teeth, since they are more defined. I let the glaze pool at the lower areas of the lower jaw's teeth to indicated little oral hygiene but much using of the teeth (saying: biting big chunks out of dragonspawn).

The last step before painting the skin was to prepare the eyes. I painted the eyes completely with a layer of Thunderhawk Blue (Citadel) and Matt Black, in a ratio of 2:1, and created a 'mask'.
To be honest, I already started to paint the eyes either (which can be seen in the next pictures) but after I finished the skin, I repainted the eyes with more matching colours.

For the skin I wanted something really pale, so I took the trollblood paints Privateer Press put on the market and added some white here, some grey there, until I was satisfied.
My basecoat to go was a mix of Thunderhawk Blue and Slaanesh Grey (Citadel), in a ratio of 1:1. As can be seen on the picture the paint is much brighter when it has dried out.

For the first highlight I added Trollblood Highlight (P3), in a ratio of 1:1:1.

For the next highlight I added a single drop of Underbelly Blue (P3) and two drops of Pallid Wych Flesh (Citadel), in a ratio of 2:1. Unfortunately I forgot to make a photo after apllying this highlight.

I wasn't done with the highlights right now but it was time to add the first shading. So I mixed some Underbelly Blue with Trollblood Base (P3) and lots of Glaze Medium, in a ratio of 1:2:5. The idea of this wash isn't to cover all areas and literally flood them, but to paint very thin layers with this wash ('glazing') in the recesses and those areas where an unspecified light source wouldn't get through.

I added Beaten Purple (P3) into the wash and put about three additional thin layers on the model.
When this was done, I painted another layer (consisting of Underbelly Blue and Pallid Wych Flesh, in a ratio of 1:1) and put highlights on all the spots where an unspecified light source would certainly put light on to it.
I also painted some curves on all the heavier muscles to define the different ridges of muscle.

After painting two very bright highlights I added one more a darker glaze, consisting of Beaten Purple, Dark Sea Blue (Vallejo) and Glaze Medium, in a ratio of 2:1.5. After this I painted a final highlight of pure Pallid Wych Flesh on the heavier muscles.

When the face was done I mixed a little bit of Fulgrim Pink (Citadel) into Pallid Wych Flesh, in a ratio of 1:3, and glazed the lips. The eyes where painted in Bloodrider Red (Citadel), with Averland Sunset (Citadel) for the pupil and a small line of Dark Sea Blue for the iris.

No comments:
Post a Comment